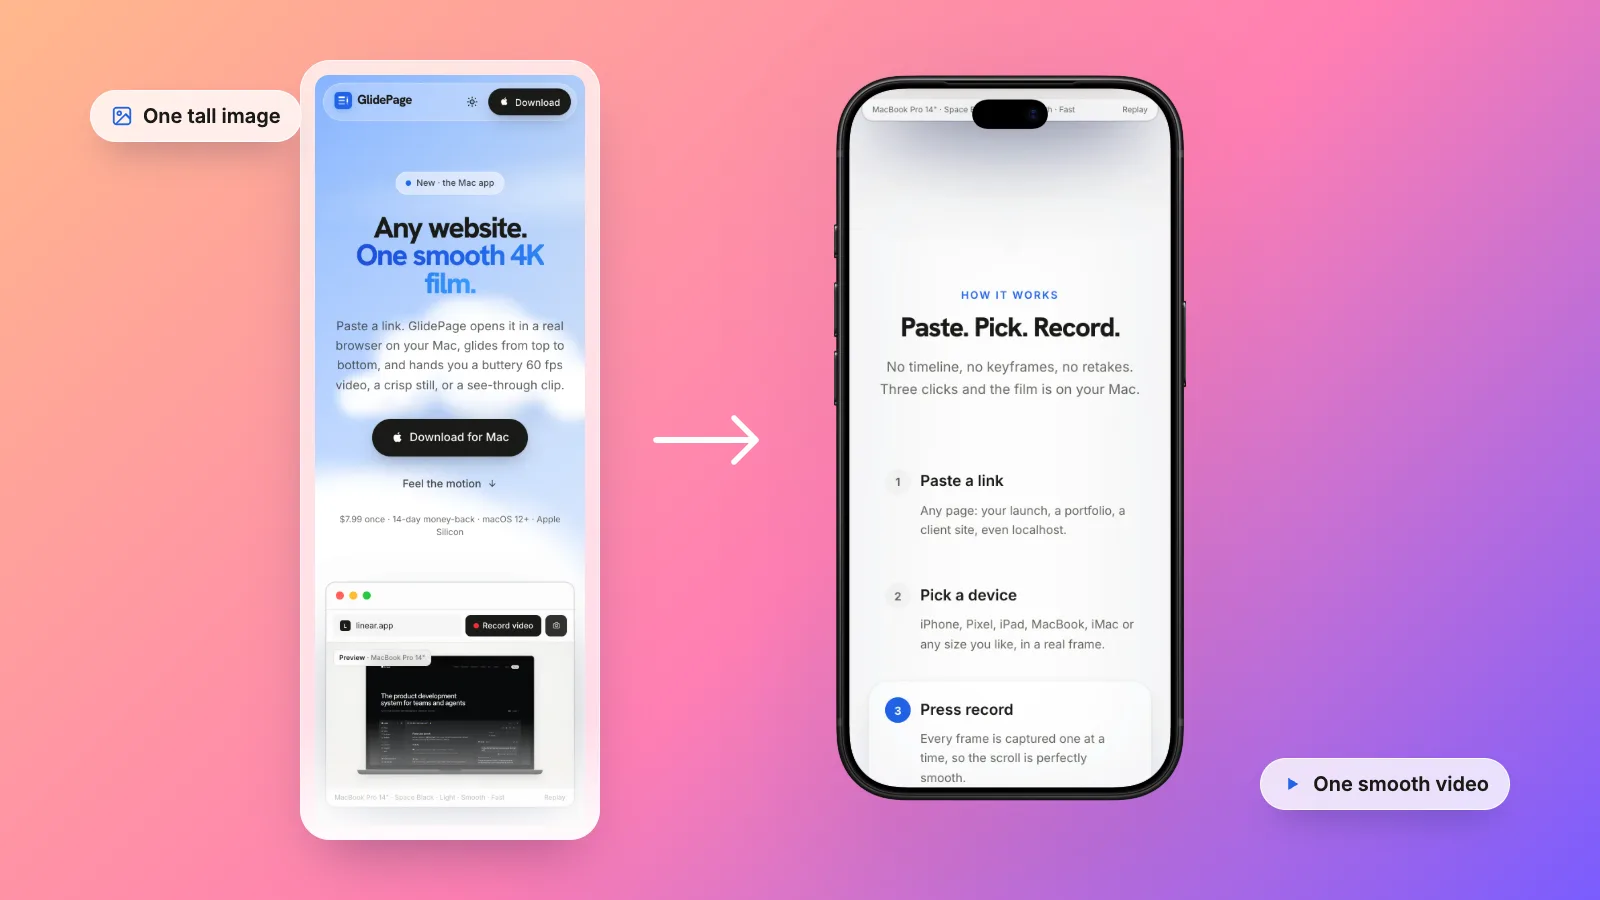
To make a scrolling website animation in After Effects, import a full-page screenshot into a composition, keyframe its Position from the top of the page to the bottom, then select both keyframes and press F9 for Easy Ease so the scroll starts and stops gently. The easing is what makes it look right: linear feels mechanical, ease-in-out feels like a camera move, and ease-out suits a short reveal that settles on one section. Keynote can do the same with Magic Move and its Acceleration menu. GlidePage, a Mac app for Apple Silicon, skips the keyframing: it scrolls the live page with six built-in motion curves and records it at 4K, 60 fps.
On this page
- What easing is
- The five curves worth knowing
- "Ease in" means different things in different apps
- Which curve suits which page
- Speed: think in seconds per screen
- How to animate a website scroll in After Effects
- How to do it in Keynote
- What a panned screenshot misses
- The shortcut: six motion curves in GlidePage
- Common easing mistakes
The usual way to fake a scrolling website in a video editor is simple: take a tall screenshot of the page, drop it into a frame, and slide it upward. Two keyframes, done.
Then you play it back and it looks wrong. The page lurches into motion, slides at a robotic speed and slams to a stop. Nothing is broken; it is missing easing. This guide explains easing in plain terms, shows which curve suits which kind of page, and walks through building the scroll in After Effects and Keynote.
What easing is#
An easing function describes how fast a value changes over the course of an animation. MDN defines it as a mathematical function that describes the rate at which a value changes, used to vary an animation's speed over its duration.
For a scroll, the value is the page position. Picture a graph:
- The horizontal axis is time, from the start of the animation (0) to the end (1).
- The vertical axis is progress, from the top of the page (0) to the bottom (1).
- The curve always runs from (0, 0) to (1, 1). Its slope is the speed: flat means barely moving, steep means moving fast.
A straight diagonal line is constant speed. Any curve that starts flat means a gentle start; any curve that ends flat means a gentle stop. That is the whole idea.
The five curves worth knowing#
CSS names the common curves, and each one is shorthand for a cubic Bézier curve, written as cubic-bezier(x1, y1, x2, y2). The four numbers are the two control points that bend the line between (0, 0) and (1, 1).
| Curve | CSS equivalent | How it moves | On a scrolling page |
|---|---|---|---|
| linear | cubic-bezier(0, 0, 1, 1) | Constant speed, no acceleration | Mechanical; abrupt start and stop |
| ease-in | cubic-bezier(0.42, 0, 1, 1) | Starts slowly, speeds up, stops abruptly | Builds momentum, then hits a wall |
| ease-out | cubic-bezier(0, 0, 0.58, 1) | Starts abruptly, slows toward the end | Feels like a flick that settles |
| ease-in-out | cubic-bezier(0.42, 0, 0.58, 1) | Slow start, faster middle, slow end | Like a camera move; the safe default |
| ease | cubic-bezier(0.25, 0.1, 0.25, 1) | Slow start, sharp acceleration, gradual slowdown | Lively, a little front-loaded |
You can make any curve in between by changing the numbers. Pull the control points further toward the corners and the start and end get slower while the middle gets faster. If a y value goes above 1 or below 0, the animation overshoots and comes back, which MDN describes as a bouncing effect. That is lovely on a button and wrong on a page scroll, where it reads as a glitch.
"Ease in" means different things in different apps#
This trips up almost everyone who moves between CSS, After Effects and Keynote:
| Where | What "ease in" does | CSS equivalent |
|---|---|---|
| CSS | ease-in starts slowly and speeds up | ease-in |
| After Effects | Easy Ease In eases speed coming into a keyframe, so motion slows as it arrives | ease-out (at that keyframe) |
| Keynote | Ease In slows objects as they approach their new position | ease-out |
In other words, CSS describes the curve from the animation's point of view (it eases in at the start), while After Effects and Keynote describe it from the keyframe's point of view (the motion eases into the destination). When a tutorial says "ease in", check which world it comes from. For a scroll, you usually want both ends eased: Easy Ease (F9) in After Effects, Ease In & Ease Out in Keynote, ease-in-out in CSS.
Which curve suits which page#
There is no single right answer, but there are good defaults:
| Page or goal | Curve | Why |
|---|---|---|
| Most landing pages and portfolio pieces | Ease-in-out | Starts calmly, covers ground, settles on the footer |
| Long articles, docs, or a background loop | Linear, at a slow speed | Even pace for reading; no speed change to notice on repeat |
| Landing pages built as distinct sections | Eased steps with a pause on each screen | Each section gets its moment, like slides |
| Very long pages | A strong ease-in-out (slow ends, quick middle) | Lingers on the hero and the ending, moves through the rest |
| A short reveal that should land on one section | Ease-out | Moves quickly, then settles and holds |
| A teaser that leads into the next shot | Ease-in | Builds momentum toward a cut |
A useful rule: the more text people need to read, the calmer the curve. Dramatic curves are for pages where the visuals carry the story.
Speed: think in seconds per screen#
Duration alone is misleading, because a long page at 10 seconds is a blur and a short page at 10 seconds drags. Think in seconds per screen height instead:
- 1 to 2 seconds per screen lets people read headlines. A good default.
- Under 1 second per screen is a teaser: people see the shape of the page but not the words.
- 2 to 3 seconds per screen suits dense pages or when the video will play small.
So an 8-screen landing page at 1.5 seconds per screen is 12 seconds of scrolling, plus a short hold at the top and bottom. Easing borrows time from the middle to spend on the ends, so an eased scroll needs a little more total time than a linear one to feel equally readable.
How to animate a website scroll in After Effects#
1. Get a full-page screenshot
You need one tall image of the whole page. Browsers can capture one; full-page screenshots vs scrolling videos covers how in Safari, Chrome and Firefox, and where those captures break.
2. Create the composition
Press Command-N for a new composition. Use the size of the final video (for example 1920 × 1080, or 3840 × 2160 for 4K) and 60 fps, which keeps scrolling text smooth. Press Command-I to import the screenshot and drag it into the composition.
3. Fit and position the page
Scale the screenshot so its width matches the width of the screen area you are filling. Move it so the top of the page sits at the top of that area.
4. Keyframe the scroll
Press P to show the layer's Position property. At the start, click the stopwatch to set a keyframe. Go to the end time, then drag the layer up until the bottom of the page reaches the bottom of the screen area. After Effects adds the second keyframe.
5. Add the easing
Select both keyframes and press F9 (Animation → Keyframe Assistant → Easy Ease). After Effects sets the speed at each keyframe to 0 with 33.33% influence, so the scroll eases out of the first and into the last. Shift-F9 eases only into selected keyframes; Command-Shift-F9 eases only out of them.
6. Shape the curve
Press Shift-F3 to open the Graph Editor and switch to the speed graph. Dragging the influence handles outward makes the start and end slower and the middle faster, which is the cinematic version. For exact numbers, select a keyframe and choose Animation → Keyframe Velocity to set the influence as a percentage.
7. Frame it and render
To place the page inside a device, precompose the screenshot layer (Command-Shift-C) and mask the precomp to the screen shape, then put a device image on top. For a page-by-page scroll, add a pair of keyframes per screen (a move, then a hold) and ease each move.
How to do it in Keynote#
Keynote does not have keyframes, but Magic Move animates the difference between two slides, and that is enough for a scroll:
- Place the tall screenshot on a slide, scaled to the slide's width, with the top of the page at the top of the slide.
- Press Command-D to duplicate the slide.
- On the second slide, move the screenshot up until the bottom of the page shows.
- Select the first slide. In the Animate sidebar, click Add an Effect and choose Magic Move.
- Set the duration with the slider, and choose Ease In & Ease Out from the Acceleration pop-up menu. None gives a constant speed.
- Choose File → Export To → Movie, and pick a resolution (Custom lets you type one in).
For page-by-page motion, make one slide per screen and chain Magic Moves with short pauses.
What a panned screenshot misses#
Easing makes a panned screenshot look smooth. It cannot make it look real, because a screenshot is a photo of a page, not the page:
- Sticky headers appear once at the top of the image (or repeated, depending on the capture) instead of staying pinned as the page moves.
- Reveal animations are frozen in whatever state they were in during the capture, often invisible.
- Videos and carousels on the page do not play.
- Lazy-loaded images can be blank if they never loaded during the capture.
- Full-height sections sized to the viewport can come out stretched or oddly short.
For a quick social clip, a panned screenshot is often fine. For a portfolio or a launch, a recording of the real page scrolling looks noticeably better. Scrolling website mockups compares the two approaches in more detail.
The shortcut: six motion curves in GlidePage#
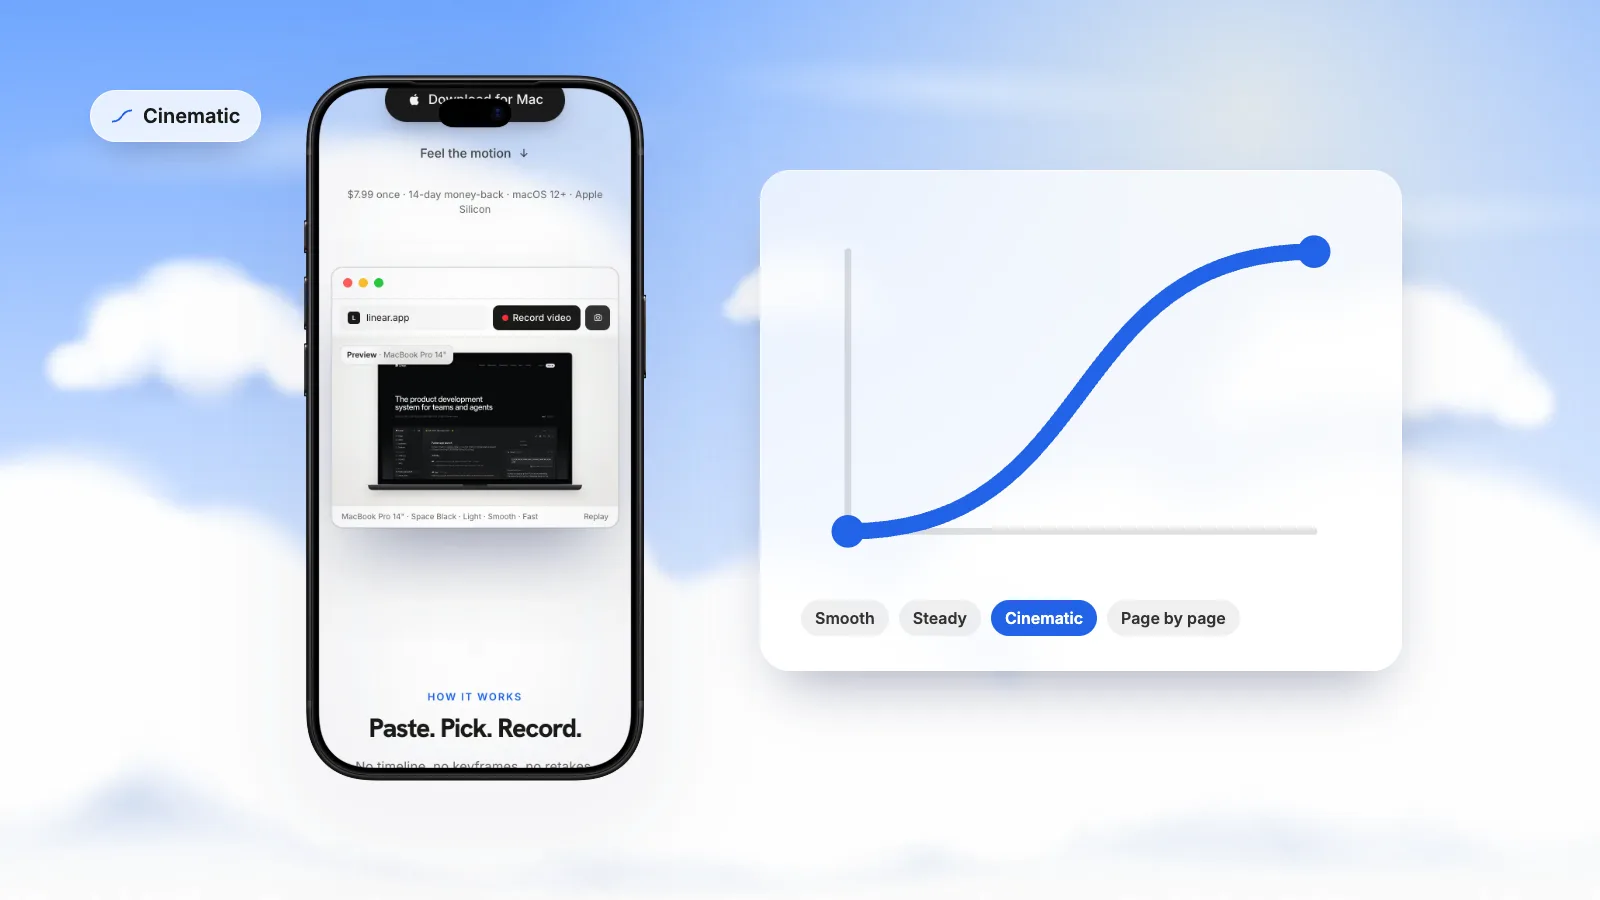
GlidePage is a Mac app that scrolls the real page and records it frame by frame, so sticky headers stay pinned, reveal animations play and on-page videos advance with the scroll. The easing is built in as six motion styles:
| Motion style | What it does | Closest curve | Good for |
|---|---|---|---|
| Smooth | Eases in and out | ease-in-out | Most pages; the safe default |
| Steady | Constant speed | linear | Long reads, docs, background loops |
| Build up | Starts slow, speeds up | ease-in | Teasers that cut to another shot |
| Glide in | Starts fast, slows to a stop | ease-out | Short reveals that land on one section |
| Cinematic | Slow ends, quick middle | strong ease-in-out | Long pages, portfolio showpieces |
| Page by page | One screen at a time, with a pause | eased steps | Landing pages built as sections |
Speed is a continuous slider from leisurely to turbo, measured in seconds per screen, and it follows the screen height, so a phone and a desktop recording at the same setting feel similar. You paste a link, pick a device and frame, choose a curve and press Record; it scrolls through once to load everything, then captures a 4K, 60 fps video. It runs on Apple Silicon Macs with macOS 12 or later and does not record pages behind a login. The full walkthrough is in how to make a scrolling video of a website.
Common easing mistakes#
- Linear with no holds. The first frame is already moving and the last frame stops dead. At minimum, add a short hold at each end.
- Too much easing on a short clip. On a 4-second scroll, a strong curve spends most of the time nearly still and then whips through the middle. Use a gentler curve or more time.
- Overshoot. A curve with values outside 0 to 1 bounces past the bottom of the page and back. Keep scroll curves between 0 and 1.
- 30 fps. Even a perfect curve judders at 30 fps when the whole frame moves. Render at 60. Why screen recordings look choppy explains why.
- Too fast for the text. If people cannot read the headlines, slow down before you touch the curve.
Sources
- MDN: <easing-function> (checked September 2026)
- MDN: cubic-bezier() (checked September 2026)
- Adobe After Effects User Guide: Speed (Easy Ease and Keyframe Velocity) (checked September 2026)
- Adobe After Effects User Guide: Keyboard shortcuts (checked September 2026)
- Apple Support: Add transitions between slides in Keynote on Mac (Magic Move) (checked September 2026)
- Apple Support: Export to PowerPoint or another file format in Keynote on Mac (checked September 2026)

Make your site move.
Any page, one smooth 4K video. Framed, on any background, or transparent.
Questions, answered
How do I animate a website scroll in After Effects?
Import a full-page screenshot into a composition, press P to show Position, set a keyframe with the top of the page in view, then move to the end time and drag the layer up so the bottom shows. Select both keyframes and press F9 for Easy Ease, then fine-tune the speed in the Graph Editor.
Should a scroll animation be linear or eased?
Eased, in most cases. An ease-in-out curve starts gently, moves through the middle and settles at the end, which looks like a deliberate camera move. Linear suits long, slow reads and background loops where a constant pace is less noticeable on repeat.
What is the difference between ease in and ease out?
In CSS, ease-in starts slowly and speeds up, and ease-out starts fast and slows down at the end. After Effects and Keynote name them from the keyframe's point of view, so their "ease in" slows motion as it arrives, which matches CSS ease-out.
What does cubic-bezier mean?
cubic-bezier(x1, y1, x2, y2) defines an easing curve from (0, 0) to (1, 1) using two control points. The x axis is time and the y axis is progress, so the curve's steepness is the speed at each moment. The keywords ease, ease-in, ease-out and ease-in-out are preset cubic-bezier values.
How fast should a website scroll in a video?
About one to two seconds per screen height is readable for most pages. Go faster for a teaser where the words do not matter, and slower for dense pages or videos that will play small in a feed.
Can I make a scrolling website animation without After Effects?
Yes. Keynote can do it with Magic Move between two slides and the Ease In & Ease Out acceleration setting, then File → Export To → Movie. GlidePage, a Mac app, records the live page with six built-in motion curves, so there is nothing to keyframe.